💡 What this guide covers: what Codex and VS Code are, which interface to choose, how to install Codex, and how to practice.
More Codex articles: Save Effort · Codex
1. What can Codex actually do for you?
Most people know AI as a conversation: you ask a question, the model answers, and you follow its instructions. That is the familiar ChatGPT workflow. With Codex, you can ask it to do the work directly, as long as the work can be done on a computer.
Suppose you want to open an image community in Chrome and download a soccer picture. Here are two routes:
ChatGPT: ask which communities to use → get an answer → open the link yourself → search for soccer → right-click to download. Codex: ask it to find a soccer picture on a quality image site and put it in your document → Codex opens your browser or uses its search tools, downloads the image, and places it in the document.
Another example:
People used to approach AI coding in two main ways: paste code into ChatGPT for an explanation, or use an IDE completion tool to finish a few lines. Codex goes further: it helps move a task forward. It reads code, edits files, runs commands, writes tests, checks diffs, and reviews changes. You can simply describe the feature you want.
Think of the difference this way:
- ChatGPT is a knowledgeable adviser: it generally answers rather than operating your computer. Its chat models can now do some work, such as creating a PDF, but there are limits: they stay within the webpage, and you need to upload your files.
- Codex is a colleague sitting beside you: it can operate your computer, read and edit files, run commands, and inspect diffs. Tell it what to do and where the files are.
Codex can take on repetitive, time-consuming work so you can focus on judgment and creativity, such as system design and architecture. It is smart, but it can also get ahead of itself. First learn how to keep it under control; the rest of this series walks through that.
How are VS Code and Codex different?
- The VS Code extension: Codex is an extension inside Visual Studio Code. Once installed, it appears in the sidebar. It can see the file you have open, making it useful for questions while coding, small edits, and reviewing before-and-after differences. You can apply or reject changes, or let it edit directly. The task doesn’t even have to involve code, provided you give it the necessary permissions.
- Codex directly, through a client or the CLI: enter a project folder in your terminal and run
codex. This is suited to running commands, batch changes, and scripts directly within the project. - Codex App: a standalone desktop application that acts as a task center. It manages several projects and tasks, shows progress, and makes switching projects easy. It is useful for larger assignments.
Which should you choose?
- A focused edit to a file: use the VS Code extension.
- A long-running task across several files: use the CLI or App.
- Complete beginner: start with the App and add the extension or CLI later. If you don’t code, use the App directly.
They work well together. Many people make small changes in VS Code and send bigger jobs to the CLI or App. Sign-in is shared: sign in on one side and use the other. You don’t need the CLI to install the extension. Usage limits are shared too.
Things to watch when installing Codex in VS Code
- Installing the wrong extension: searching only for “Codex” may put unrelated extensions first. Find the official one.
- Choosing the wrong interface: pushing every task through one interface can make the experience awkward. Of course, if all you care about is finishing the task, use whichever works for you.
- Windows instability: the VS Code extension is still marked experimental on Windows. We have used it on Windows and macOS: Windows occasionally has lag or MCP problems, while the Mac experience is noticeably smoother. If you have the option, buying a Mac is worth considering.
- Starting with an important project: don’t use production work before learning how Codex reads context, runs commands, and requests approval. In my experience, using agents initially makes you feel you can do anything. Over time, you realize that knowing what to ask for—and how to check it—matters more.
- Using Codex as a search engine: ChatGPT is enough for conceptual questions. It doesn’t use your Codex allowance, and Codex brings more context and noise. Without a substantial task, it is overkill and less efficient.
2. What each interface is for
Codex is now a workflow with several places for the same agent to work:
| Interface | Best suited to |
|---|---|
| Codex desktop App | Managing tasks, progress, projects, multiple devices, remote projects, and some local operations |
| IDE extension: VS Code, Cursor, Windsurf, JetBrains, Xcode | Explaining the current file, editing selections, focused refactors, reviewing diffs, applying or rejecting changes |
| CLI | Reading and editing code and running commands in a chosen directory; lightweight work and scripts |
| Codex Web / Cloud | Background tasks, especially GitHub repositories, PRs, and parallel work |
| SDK / headless mode | Integrating Codex into your own application or automation pipeline |
| Browser | Opening pages to check the actual result |
| Computer-use agent | Operating browsers, admin consoles, and desktop applications |
| ChatGPT web | Research, analysis, and creative work in a browser |
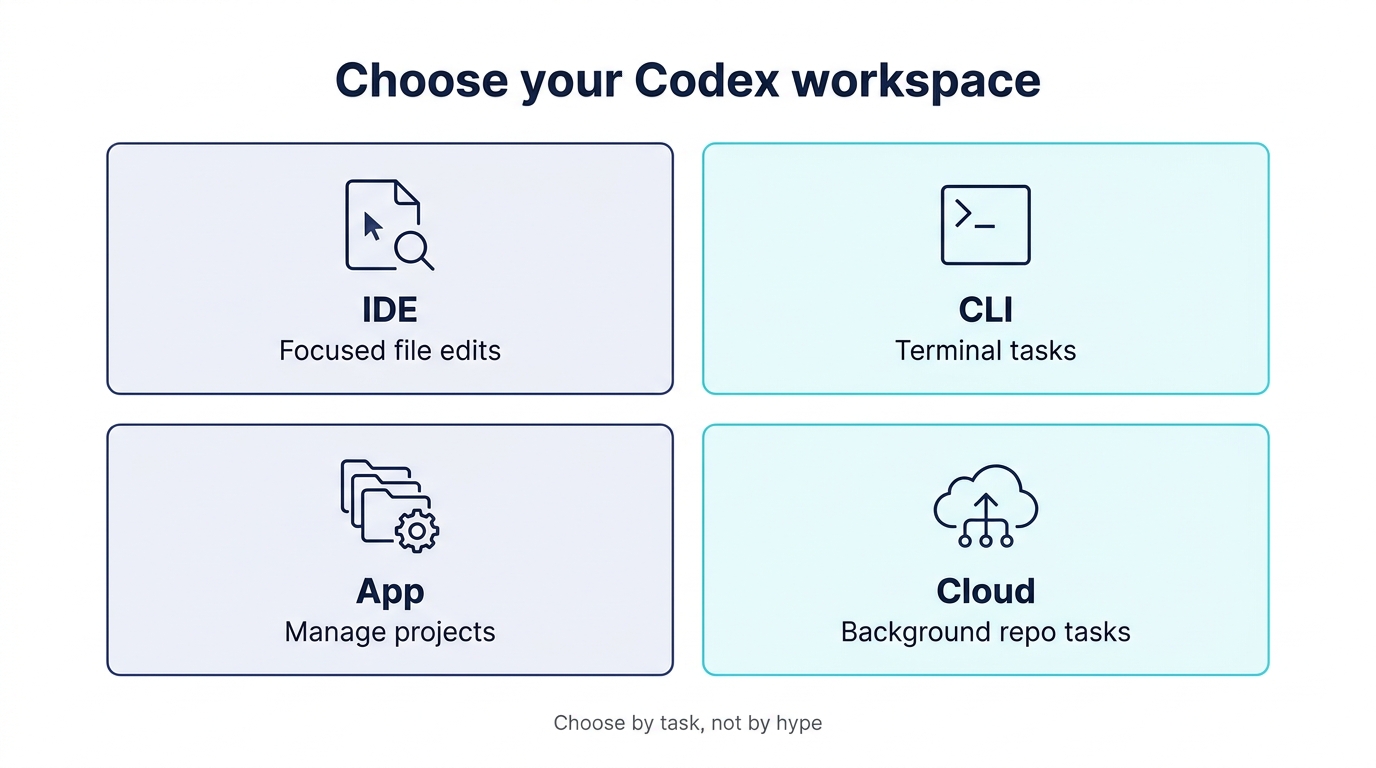
Codex interface choices: IDE for focused file edits, CLI for terminal tasks, App for project management, and Cloud for background repository work.
On macOS, the extension also connects the ChatGPT desktop App to VS Code. Open the ChatGPT macOS App and select Work with VS Code to ask questions or make simple edits.
A short way to choose:
- The App manages tasks; the IDE keeps you close to code; the CLI runs commands; the browser checks webpages; the agent operates desktop apps; Cloud runs longer jobs in the background.
- Use the CLI for a quick change, the IDE extension for ongoing development, and the SDK when integrating Codex into your own tools.
More specifically:
- The IDE has nearby context and suits asking while you code. The CLI suits assigning work directly.
- The App is a task center for assignments, progress, and projects. The IDE is a workbench for careful edits to a file, diff, or function. Developers often use both: small edits in the IDE, cross-file, cross-project, and long tasks in the App or Cloud.
- Use App / IDE / CLI for tasks that depend heavily on your local environment; Cloud for repository-based background work; Browser for visual checks; and the agent for desktop operations.
- Beginners can start with the App because it gives a fuller view of tasks, context, permissions, and execution. It is fine to keep using it once you become more experienced.
When to stay in the IDE
Four types of work fit well in the editor:
- Focused small changes: relevant files and Codex are in the same view.
- Learning unfamiliar code: ask about files and symbols already open.
- Reviewing in place: inspect and apply changes beside the source.
- Delegating larger tasks: start a cloud task from the IDE and return to review it.
Typical actions include explaining a file, editing selected code, making a small refactor from open code, inspecting diffs, and accepting or rejecting AI changes.
3. What you need to use Codex
- You generally need a subscription. Plus commonly costs US$20 in standard-priced regions, with five-hour and weekly limits. Pro options at US$100, US$200, and US$500 provide different allowances. OpenAI currently has a promotion offering API credits.
- The VS Code extension itself is free, with more than 16 million installs shown in the marketplace, but it is barely usable without a subscription.
- For usage and model choices, see long tasks, cloud workflows, and limits.
4. Install the right VS Code extension
- Open the Extensions panel on the left of VS Code.
- Search for OpenAI Codex. Searching only “Codex” may show unrelated results first.
- Check that the publisher is OpenAI, the name is “Codex – OpenAI’s coding agent,” and the ID is
openai.chatgpt. - Install it and restart VS Code.
- Click the OpenAI icon in the activity bar to open the panel. If it is missing, open the command palette and run Codex: Open Codex Sidebar.
- A useful layout: drag Codex to the right, with files on the left and chat on the right.
A few notes:
- You do not need to install the CLI first. The extension works independently.
- The details page shows the current version and lets you switch to a pre-release or release candidate when needed.
- Automatic updates: keep them on in general because Codex changes frequently. However, several versions in early October 2026 had stuck-message problems. Some users recovered by disabling updates and rolling back. See troubleshooting if this happens.
- Cursor, Windsurf, and VS Code Insiders use the same extension. In Xcode, start a conversation in the coding assistant and choose Codex. In JetBrains, open AI Chat and select Codex.
- If you previously used the project in the Codex App, install the extension, restart VS Code, and open the same folder. Earlier conversations load so you can continue them.
5. Install the CLI if you need it
The CLI is optional, but worth knowing about even if you mainly use the App.
Choose one installation method. npm and Homebrew make updates easier:
# npm
npm install -g @openai/codex@latest
codex --version

# macOS Homebrew
brew install --cask codex
# Upgrade later
brew upgrade --cask codex
codex --version
Things to know:
- Updates can arrive several times a week. A banner at startup tells you when a new version is available.
- Codex CLI is open source. GitHub hosts release packages, and the developer website’s changelog explains changes.
- Enter the project directory before starting:
cd your-project
codex- If installation fails, don’t struggle alone. Tell an AI—ChatGPT, Claude, DeepSeek, Doubao, or Gemini—“I’m on Mac / Windows. Help me install Codex CLI.” Follow its steps and send a screenshot if you hit an error.
- I wouldn’t start with the CLI on day one; the App is more visual. Later, the CLI can feel great because it works close to the real engineering environment.
6. Sign in
- Personal users: sign in with your ChatGPT account. No API key or environment variable is needed.
- Company users: run
codex login. A browser opens; sign in with your company email. You will usually be sent to your company’s SSO system to complete verification. - In VS Code: the first opening shows a sign-in page. The process resembles the CLI flow. After signing in, complete the short onboarding sequence to reach the main chat.
- Shared sign-in: signing in through either the CLI or extension also signs in the other.
For login failures and codex: command not found, see troubleshooting.
7. Windows users: read this first
- The VS Code extension spent a long time marked experimental on Windows. Occasional lag and MCP problems have been common.
- Configure the Windows sandbox in
config.toml:
[windows]
sandbox = "elevated"      # Officially recommended
# sandbox = "unelevated" # Use if you lack admin rights or elevated setup fails- If CLI PATH setup is difficult, start with the App instead of getting stuck on the environment.
- After changing environment variables, fully quit and reopen Codex. Restart the computer if that doesn’t work.
- See the configuration guide for other settings, and troubleshooting for known Windows problems.
8. Get to know the interface
The VS Code panel
- Chat window: enter prompts, with controls beside it to manage context.
- Bottom: switch modes such as Chat, Agent, and full access; choose local or cloud execution; select model and reasoning effort. See permissions and model selection.
- Top: recent Codex Cloud tasks. Open them in the extension and reply to continue work in the cloud. See cloud workflows.
- Gear icon: opens Codex Settings, including
config.toml. See configuration.
The Codex App
- Left: projects and past tasks—the workspaces Codex is managing.
- Middle: the current task thread, including your requests, Codex’s reasoning and actions, and the final result.
- Right: environment details such as workspace, model, execution environment, context status, and enabled capabilities.
- Bottom: the input area, model, permissions, Send button, and context attachments.
Beginners should check permission settings first: automatic approval, full access, when approval is needed, the active workspace, and whether Codex can operate the local computer.
9. Run /status before you start
If you aren’t sure what state Codex is in, enter /status. It brings together:
- The current CLI version.
- The active model.
- The working directory and writable location.
- Sandbox mode.
- Approval policy.
- Remaining context-window capacity.
- Any
AGENTS.mdin the current directory that participates in project configuration.
Use it when you worry about the wrong directory, a model switch not taking effect, read-only status, or an overly long conversation. For beginners, /status should be the first troubleshooting reflex.
10. Choose a practice project for day one
Don’t begin with your most important project. This is about learning how Codex reads context, runs commands, and asks for approval. Good practice projects include:
- A demo repository.
- A small personal script.
- A static page.
- A documentation folder.
- A small project with no keys or real user data.
Your first-day goal is to understand four things:
- How it interprets the task.
- Which files it changes.
- Which commands it runs.
- How it proves the work is finished.
A ready-made practice repository: try OpenAI’s open-source agents.md website.
git clone https://github.com/openai/agents.md.git
cd agents.md
npm install
npm run dev
11. Your first task: ask, don’t edit
Make the first request read-only. In Chat mode, ask:
Can you give me a quick summary of what this project is?Codex searches the files and returns bullet points. Check whether it identifies the home route, main components, form validation, shared layout, styling tools, and test tools. If the project uses Tailwind CSS v4 and Vitest, for example, it should identify both. Files and commands mentioned in the answer should exist in the repository.
You can also use this task description:
Read this project's README, package.json, and main entry files.
Analyze only. Do not edit code.
Tell me:
1. What the project does
2. How to run it locally
3. Which command runs the tests
4. Three small tasks you recommend next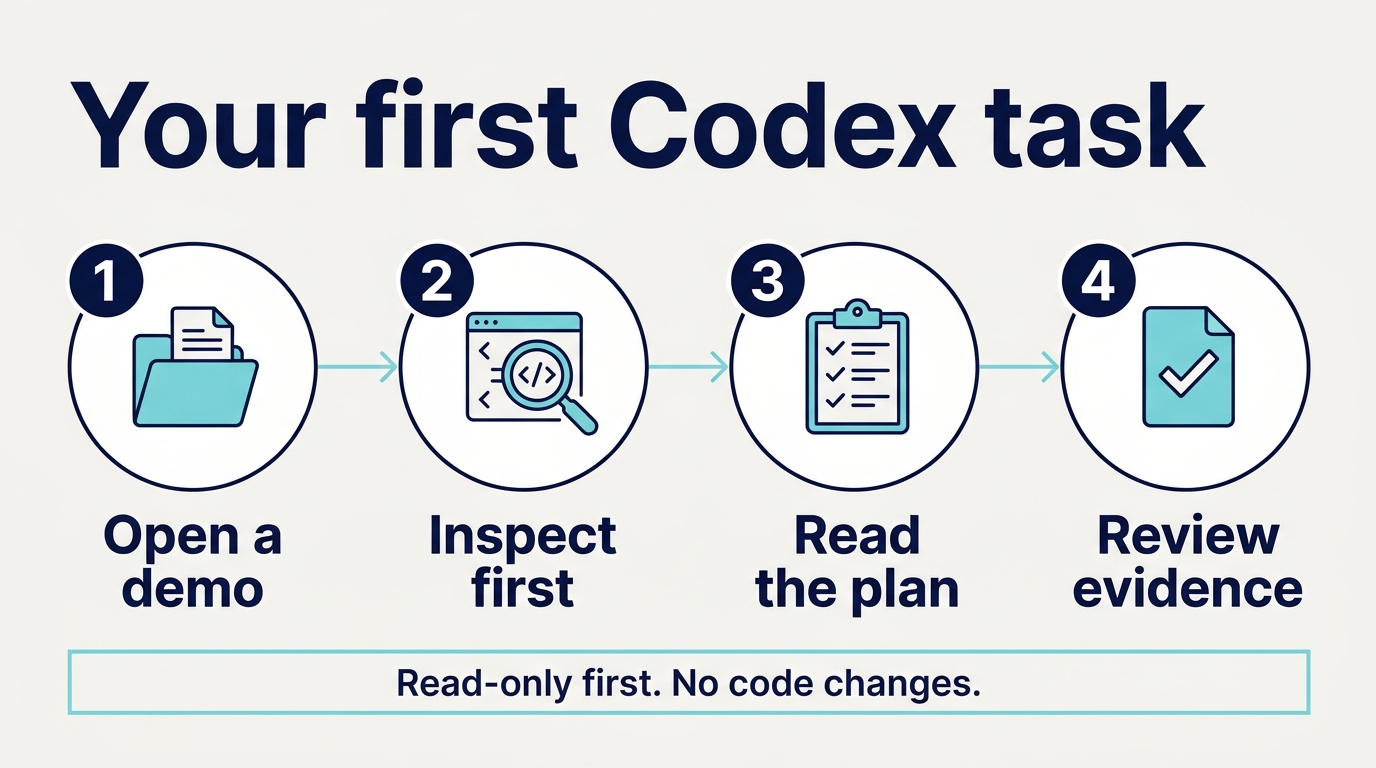
First-task workflow: open a demo project, inspect it without editing, read the proposed next steps, and review the evidence.
Do the same in Codex Cloud: connect the repository, then ask what the project does. Check its understanding before asking it to “refactor the whole system.”
For tasks two and three and ways to add context, see prompts, context, and slash commands.
12. A seven-day practice plan
Practice one small goal each day:
| Day | Task | Goal | Details |
|---|---|---|---|
| 1 | Read only: “Explain the project structure, local startup, test command, and three small tasks you recommend.” | See how Codex reads context | This guide |
| 2 | Documentation only: “Update the README’s local startup steps based on the actual project. Edit only the README.” | See how it edits files | Prompts |
| 3 | Low-risk bug: “Fix inconsistent wording on a button. Don’t change API logic. Run lint afterward.” | Learn diffs and verification | Safe changes |
| 4 | Code review: “Review the current diff. Give feedback only; don’t edit code.” | Judge its work | Code review |
| 5 | Browser check: “Start the local project and check the first screen on mobile and desktop. Screenshot and explain issues before fixing them.” | Connect code to visual results | Frontend verification |
| 6 | Try the IDE or CLI | Work closer to where you actually code | This guide |
| 7 | Write AGENTS.md | Stop starting each task from zero | Configuration |
Don’t put Codex on a pedestal, but don’t avoid it out of fear either. Start with a demo, small tasks, limited permissions, and thorough checks. Gradually allow more as you become comfortable.